Three fun, fast and easy DIY revamps to transform your home
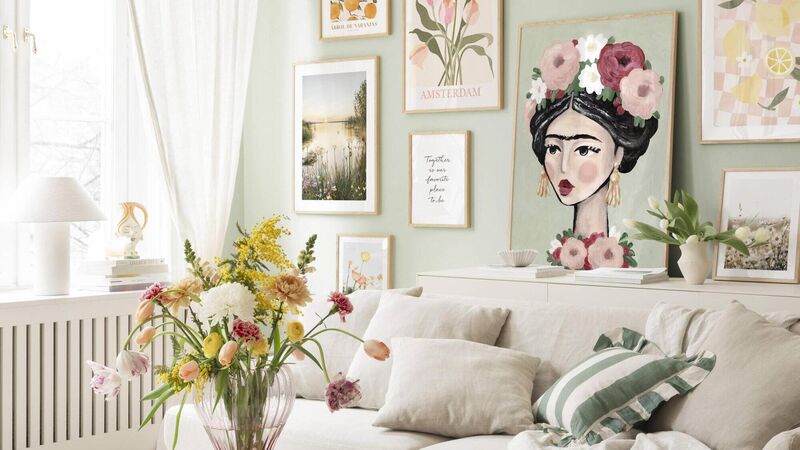
Gallery walls deliver incredible character and can be shuffled up in an afternoon. Images from posterstore.com (Sweden).
In just about every area of your home, there are affordable, easy cosmetic tickles and tiny shifts in detailing that can transform the jaded and uninspiring into something fresh, fashionable and deeply satisfying. Here are three adventures where a few hours' work could ring the changes for Summer 2024. I’m rating these starter projects from an easy 1-2 up to a high five for a job requiring some DIY confidence and patience.
It's helpful to be able to handle a small drill
I’m going to stick my neck out for the chop here and say that most people (including popular creative souls on Instagram), do not understand the basics of hanging a single picture at the right height. Nine times out of ten, we put those frames not centred on our eye-line, but set well above the recommendation of 145cm to 153cm for something seen while standing (or the 57-inch rule). It’s tricky, as there are often interrupting features around or below the piece.

Gallery, or more primly “salon” walls, curate a stunning, highly personal feature in a struggling room or even a staircase and remove the need to get that single picture at just the right point. Snuggle even middling artwork and framed photos together, give small, orphaned, individual items a greater aesthetic punch. Keep in mind that we don’t have to limit ourselves to pictures. With the right support, that tangled diorama of ornamental and sentimental stuff heaped up on every shelf and table surface can fly up the walls. You can also use this as a spatial/proportion hack, visually tweaking awkward, odd spaces with creative placements that will make walls seem higher, wider or longer.
Create a soft or firm shape with a group of pictures, containing them within an invisible “frame” or running up or down along a centring line. You can mark this up with low-tack tape. A cruciform can be very effective, but trawl Instagram for thousands of possible groupings. Don’t set the bottom line or picture too high.
Use newspaper cut-outs to mock up the gallery rather than heaving heavy frames into position.
Despite any guide, there will be a natural “rightness” to a good position. Your eye is a very sophisticated instrument — trust its little gimble to find a pleasing rhythm and play of colour and form.
Don’t worry: Mismatching is often more satisfying than smartly matching frames struggling with very different contents like photographs, drawings, impasto oils, and kids’ kindergarten masterpieces.
Think eclectic. Sculpture can sit on small semi-circular shelf supports, and antiques like hand mirrors or rusted keys can go on proud display. For character — mix it up.
Run different sizes of frames using a horizontal line that hits the centre of the height of each piece. With various sizes and heights try off-setting the works against each other in a soft arrangement.
Record experiments in composition with your phone camera, and re-shuffle.
Find the right wall fixings for the weight of the piece and the substrate. Plasterboard requires dedicated screws and plugs. Adhesive hooks have very particular weight ratings and are best reserved for clip frames that can cycle kids' artwork as it comes home. Handy small drill? My vote is for the ultimate multitasker, the Bosch 3.6V 1 x 2 Li-ion Cordless Screwdriver IXO 7, €47, multiple suppliers.

3
Painted pantry cupboards are all the rage. If you don’t have a free-standing or built-in pantry to slather in some summer love, pick out an area of cabinetry (base or wall) to take an eye-catching feature colour. What’s trending? Step away from commonplace inky blues, faint neutrals and even grey, and move towards warmer, earthy tones like burgundy, greens and even Dutch pink (a mustard yellow!). We need something that won’t be a thug towards what’s already in place. Pick up some colour cards or make your own and test, test, test in a variety of lighting conditions. Don’t trust the rendering of a colour on your PC or mobile device. Both MDF and laminates can be painted or sprayed in an eggshell, satin finish or gloss (tough to do right). Every surface will require light sanding (to create a key), priming (depending on the product) and painting on both sides of the doors at least.
Remove any pulls and handles and consider an upgrade, matching new hardware to old holes where possible. Over-sized cup handles are everywhere this year. Try IKEA for their 89mm Eneryda, €11 for two, Ikea.com/ie.
Cabinets are quietly filthy, and you won’t notice most of it. Use a de-greasing agent like sugar soap.
Wear a mask for sanding, as the dust is an irritant, and follow the supplier’s instructions to the letter.
If weather or shelter allows, it’s worth taking doors off and drawers down. Carry them outside to work on a saw-horse or against a wall. Prefer to spray? The Wagner 230V 280w Paint sprayer can handle everything from fence paint to gloss, €63, B&Q, diy.ie.
Returning the cabinet doors, use those nifty four-way adjustable, concealed hinges to create perfectly level action.
My choice of paint is Rust-Oleum Kitchen Cupboard Paint in a pea-sweet, Jasper Green. This washable matt can deal with wood and melamine and requires no priming or sealing, 750ml €40, suppliers include Woodies DIY.

4 for taps, 2 for the rest
The smallest room in the house and one that gets a heavy hammering, it’s not long before the most durable bathroom starts to look dirty. A veil of scum will drag any bathroom down.
The first things to go toes up is the plating on taps, the condition of the grout, and the sealant applied by tube or gut to the bath’s edge or delivered as rubber seals around the shower or any shower panel. Changing out a basin tap is not a difficult job with modern plumbing connections.
There are a few things to remember. First and most importantly, turn off the water supply. If there are isolator valves you can do it under the basin position, otherwise determine where the stop-cock is before proceeding.
Flexible, short, braided hoses going to each tap (hot/cold) are relatively straightforward to disconnect using a couple of spanner types (I’m not going to lie, it’s fiddly!).
New connectors will seal on an O-ring as you tighten them up. For everything you want to know follow my favourite man with a spanner, James @plumberparts on YouTube. He has a dedicated video here: youtube.com/watch?v=0q9ey0kgU3M. Listen closely to his tip for turning the pressure back on after the job. Now for the bathroom grout.
When removing the old sealant, veer on the side of caution with a dull-bladed knife or dedicated plastic tool that won’t scratch your plastic or enamel.
Ensure you scrub off every bit of old seal to ensure a good adhesion for new material.

Use a mould-resistant, silicone bathroom sealant. You can use a tube or a gun, but the crucial thing is to apply a consistent amount of sealant as you run it along. My choice is Unibond Kitchen & Bathroom, from €13, depending on tube size; bubble seals for glass panels by Aqualux (5mm x 1500mm from €15), screwfix.ie.
An alternative solid seal to cut to fit? Try Polycell Sealant Strip Bathroom/Kitchen White 22mm x 3.35m, €17.99, lenehans.ie.
Half-fill the bath before you start. The bath will sink a fraction, replicating where the top edge sits when you step in for a bath or shower.
Concerned about making a clean run and you don’t have a line of tiles to follow? Use blue painter’s tape to create a channel to work along. Lift the tape before the the sealant completely dries.
Grotty grout?
Bleach and ammonia mixtures are caustic, corrosive and reactive.Follow our Earth-friendly guide to bring your grout back to immaculate beauty
here.