Darina Allen: Sophie Morris shares three homemade recipes from her new book
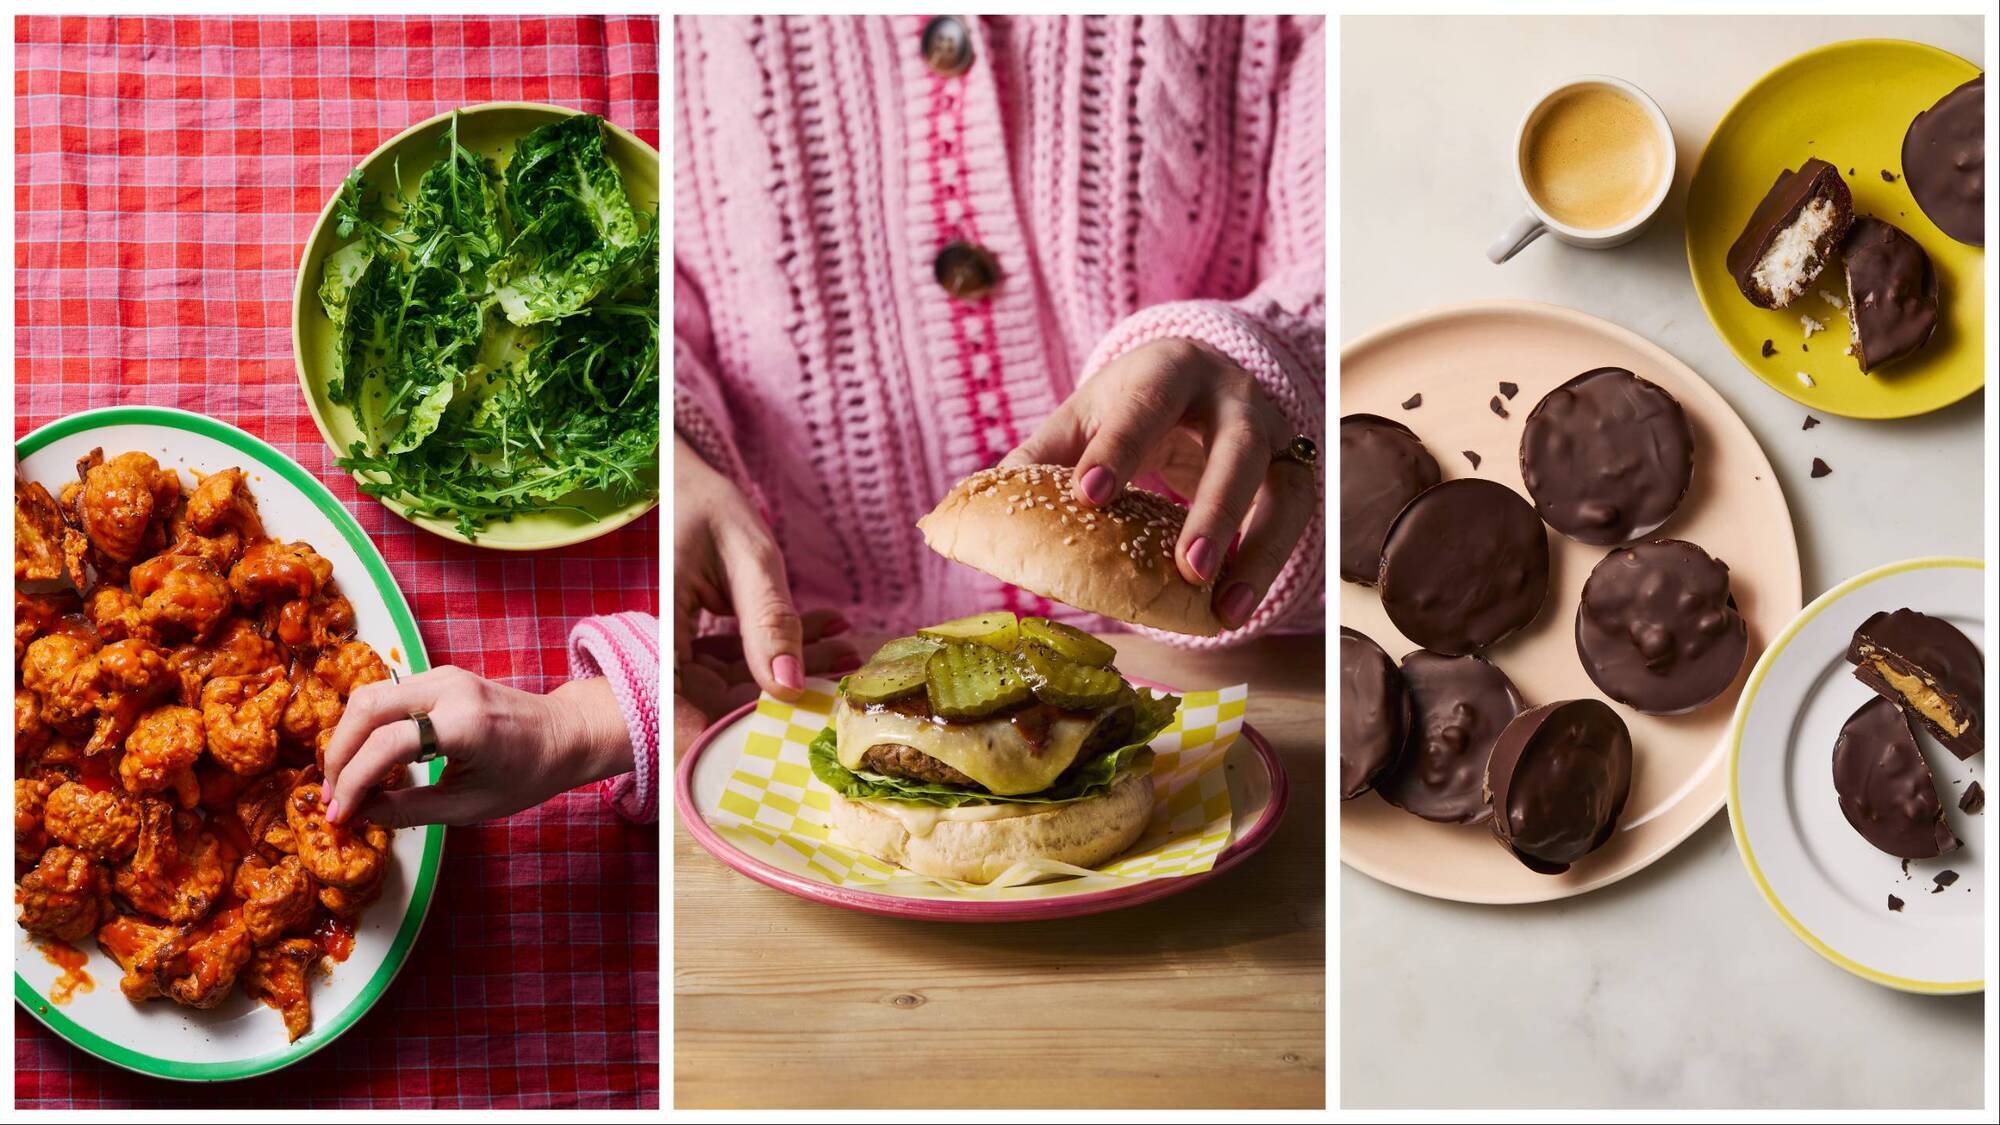
Sophie Morris' homemade Spicy Cauliflower Wings, Beef and Bean Burgers, and Snickers and Bounty Bites

Regular readers of my column will know how highly concerned I am about our growing addiction to ultra-processed food. We already eat more ultra-processed foods on average than any other country in Europe, less than America you’ll be glad to hear but we’re fast catching up – not a statistic we can be proud of.
- Understanding Ultra-Processed Foods and their Impact
- Changing Our Mindset for Long-Term Health
- Convenience Cooking and Freezing
- How to Read a Food Label
- Store-Cupboard Essentials and Hero Products
- Weekly Meal Plan and Reducing Waste at Home
- Simple Cooking Swaps
- Sophie’s Swaps Homemade Wins by Sophie Morris published by DK (Doris Kindersley Limited)
These Beef and Bean Burgers are a healthy homemade swap for the classic burger. By mixing minced (ground) beef with black beans, you get burgers that are juicy, full of flavour, and more nourishing, too. The beans stretch the meat further and add fibre and micronutrients. Serve in soft burger buns with melted cheese, crunchy gherkins, and a generous spoonful of my homemade barbecue sauce and mayo. If you’re feeling organised, you can even make the bread rolls from the ‘Breads’ chapter, which turns this into a completely homemade burger night — and it’s far easier than you might think!
You can omit the spices if making for picky kids. The uncooked patties can be frozen, place them on a tray lined with baking parchment, ensuring they are not touching and freeze until firm (about one to two hours). Once frozen, transfer to an airtight container and freeze for up to three months. To cook, defrost the patties overnight in the fridge, then cook as in the recipe.
The homemade barbecue sauce is such a great swap for store-bought sauces. It’s absolutely delicious, takes practically no effort and is made in minutes.
Beef and Bean Burgers
These are a healthy homemade swap for the classic burger. By mixing minced (ground) beef with black beans, you get burgers that are juicy, full of flavour, and more nourishing, too.

Servings
6Preparation Time
10 minsCooking Time
10 minsTotal Time
20 minsCourse
MainIngredients
400g minced (ground) beef (15-20% fat content)
400g can black beans, drained and rinsed
½ small onion, finely chopped
1 garlic clove, crushed
1 tsp smoked paprika
1 tsp ground cumin
1 egg
3 tbsp fresh breadcrumbs
Drizzle of olive oil
Salt and black pepper
To serve
6 slices cheddar cheese
6 burger buns
gherkins, sliced
For the Sweet and smoky BBQ sauce
2 tbsp tomato purée (paste)
2 tsp Dijon mustard
½ tsp garlic powder
2 tbsp honey, or to taste
6 tbsp balsamic vinegar, or to taste
4 tbsp Worcestershire sauce
For the Five-minute Mayonnaise
2 egg yolks (I tend to throw the reserved egg whites into an omelette with a few whole eggs)
1 tbsp Dijon mustard
good pinch of sea salt
300-350ml mild-flavoured oil
Juice of ½-1 lemon, to taste
2-3 tbsp white wine vinegar, to taste
Special equipment
Food processor
Method
Put the mince, beans, onion, garlic, spices, egg, breadcrumbs, and some salt and pepper in a food processor and blitz to combine.
Shape the mixture into six patties and refrigerate them for at least 20 minutes before cooking.
Heat a drizzle of olive oil in a frying pan (skillet) and cook the burgers for around five minutes on each side until cooked through.
Place a slice of cheese on each burger for the final minute of cooking and allow it to melt.
Split and toast the buns lightly.
Add the burgers to the buns along with some sliced gherkins and a generous spoonful of barbecue sauce and mayo.
For the Sweet and smoky BBQ sauce
Place all the ingredients in a small saucepan and mix together well. Bring to a gentle simmer and cook for around five minutes, stirring, until thick.
Taste and adjust the sweetness with more honey, or sourness with more vinegar, if needed.
Store in an airtight container in the fridge for up to three weeks.
For the Five-minute Mayonnaise
Put the egg yolks, mustard, and salt into a medium bowl and whisk together with a balloon whisk until well combined.
Very slowly start adding the oil, a few drops at a time at first,whisking continuously.
Once the mixture begins to thicken and emulsify, you can startadding the oil in a slow, steady stream while whisking quickly and constantly.
Continue whisking and adding oil until the mayonnaise becomes thick, smooth, and glossy.
Stir in the lemon juice and white wine vinegar, tasting as you go until you have a balance of richness and acidity that you like.
If the mayonnaise becomes too thick, whisk one to two teaspoons of water to loosen it slightly.
Store in an airtight container in the fridge for up to one week.
Note: You can also make this in a food processor.
When my husband and I first met in our twenties, we used to love eating these Spicy Cauliflower ‘Wings’ at a local restaurant but have since swapped to making them at home and much prefer the homemade version now. They make a brilliant and delicious meat-free option for dinner or for sharing. Serve them straight from the oven with a simple green salad on the side. Frank’s Hot Sauce is a must for this recipe!
Spicy Cauliflower ‘Wings’
These cauliflower “wings” are a great homemade swap for spicy takeaway-style chicken wings. The cauliflower is coated in a simple spiced batter, baked until crisp and golden, then tossed in a sauce that gives them that classic spicy wing flavour.

Servings
4Preparation Time
10 minsCooking Time
30 minsTotal Time
40 minsCourse
MainIngredients
100g plain flour
2 tsp smoked paprika
1 tsp garlic powder
1 tsp onion powder
½ tsp sea salt
150ml milk
1 cauliflower, cut into
bite-sized florets
green salad, to serve
For the spicy sauce
6 tbsp hot sauce
(I like Frank’s Hot Sauce)
3 tbsp melted butter
Method
Preheat the oven to 220°C (200°C fan) and line two baking trays with baking parchment.
In a large bowl, combine the flour with the spices and salt. Add the milk and stir until you have a thick batter.
Add the cauliflower florets to the batter, coating each piece evenly and then place on the prepared baking trays.
Be sure to leave room between each piece of cauliflower, so they crisp up.
Bake for around 30 minutes until golden.
While the cauliflower bakes, combine the hot sauce with the melted butter and whisk to combine.
When the cauliflower is done, toss with the hot sauce in the bowl until well coated.
Serve immediately with a simple green salad on the side.
These two plays on classic chocolate bars genuinely taste better than the originals. Not only that, they also are supportive of your health, avoiding giving you a sugar high and the subsequent crash. Using a silicone muffin tray (pan) makes this recipe much easier, but you can place them directly onto baking parchment too.
‘Snickers’ and ‘Bounty’ chocolate bites
These are my homemade versions of two classic chocolate bars. Sweet, chewy Medjool dates offer a caramel-like base, then simply add nuts or coconut, cover in dark chocolate, and you’ve got a freezer stash of delicious chocolate treats made entirely from r

Servings
12Preparation Time
10 minsCooking Time
30 minsTotal Time
40 minsCourse
MainIngredients
For the ‘Snickers’ bites
12 large Medjool dates
2-3 tbsp smooth peanut butter
2-3 tbsp roasted, salted peanuts, roughly chopped
200g dark (semi-sweet) chocolate (70% cocoa solids), melted
For the ‘Bounty’ bites
12 large Medjool dates
60g desiccated (dried, shredded, unsweetened) coconut
2 tbsp coconut cream (or use the thick part from the top of a can of coconut milk)
200g dark (semi-sweet) chocolate (70% cocoa solids), melted
Special equipment
12-hole silicone muffin tray (pan)
Method
Slice each date down the centre without cutting all the way through. Remove the pit and gently flatten with your hands.
Place each date into the bottom of a 12-hole silicone muffin tray or lay them flat side by side on a baking tray (baking sheet) lined with baking parchment.
For the ‘Snickers’ bites, spoon or drizzle peanut butter into each date (it helps to warm the peanut butter slightly, so it’s extra drizzly), and sprinkle the chopped peanuts on top of the peanut butter.
For the ‘Bounty’ bites, in a bowl, mix the desiccated coconut with the coconut cream until you have a thick, slightly sticky mixture. Spoon the coconut mixture into each flattened date.
Spoon over the melted chocolate to completely cover each date and filling.
Put the tray into the freezer for 30-45 minutes until hardened, then pop the bites out of the tray and store in an airtight container in the fridge for up to one week or the freezer for up to three months.
Tip: If eating straight from the freezer, allow them to sit for a few minutes to soften slightly.