Interior design: How to rearrange your shelves like a pro
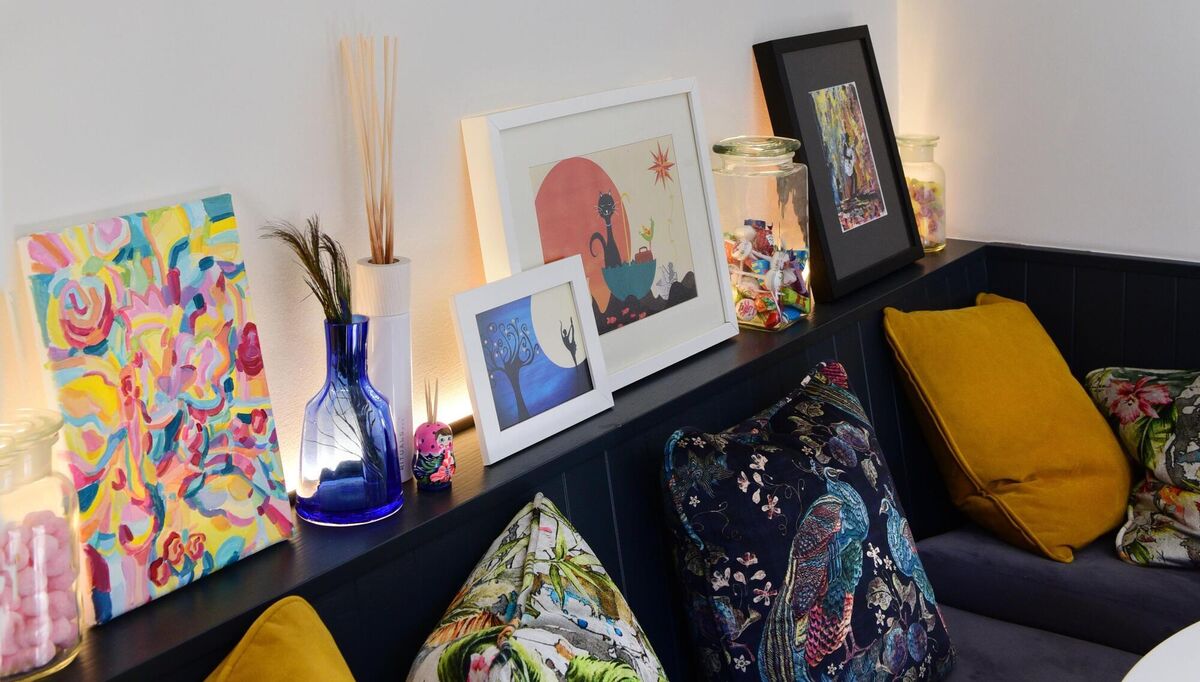
Shelf styling in Jennifer Sheahan's Rathmines home. Pictures: Moya Nolan
Shelving is a wonderful thing — a flexible and useful way to infuse personality, art, storage, colour, and texture into your home. But, done wrong, unstyled shelves look messy and, frankly, stressful.
I added narrow shelves above my banquette dining area, thinking I’d spend half an hour arranging some pictures and candles on them and calling it a day — a full two days and a minor meltdown later I finally arrived at an arrangement I was happy with. Turns out there is a whole art to styling shelves that I had grossly underestimated.
Well, what else am I good for if it’s not making mistakes so you don’t have to — I learned quite a lot in that process, to the point where I can now rearrange shelves like a pro. Luckily there are some fairly simple guidelines to follow which will make your shelves a beauty to behold.
PLAN AHEAD
Regular readers sing along with me — before you design anything, plan for how you’re going to use it. What needs to go on this shelf? What will you be doing in this space? Will this shelf be purely visual, or will you need to use the items on it regularly? Can the shelf hold the weight of the items you want to put on it? What will need to be in reach? What may be better stored out of sight — for instance, if you regularly put your keys on a certain shelf, could this shelf use a stylish basket to hold them?
Being realistic about how each set of shelves will be used will make your life easier by ensuring you have the items you need to hand, and by preventing you from creating a mess and getting frustrated.
FROM SCRATCH
Once you know how the shelf will be used, remove everything from the shelves. Do not skip this step! It may seem easier to move things around, but it isn’t — you’ll just end up shuffling items about and going in circles. Taking everything down first will allow you to assess the space available and decide what needs to be where.

Crucially, it will also allow you to assess what items should remain, and which ones you don’t need here — or at all. Things we don’t know what to do with often end up on shelves and just sit there annoying us forever.
That stone you picked up from a walk on the beach because it kind of looks like a heart but then you took it home and it’s just a bit grey and lumpy but you want to remember your nice walk on the beach so you keep it on the shelf? Dump it. Put it in your garden. Stick googly eyes on it and gift it to a loved one. Your shelf deserves better.
BALANCE
As you put items back on the shelf, start with the largest objects first — these tend to look better on higher-up shelves. Create a mix of various heights, shapes, and sizes, but to keep it balanced a good trick is to take a step back and consider the overall outline of the group of items. You might like a curve of taller items in the middle and smaller items on either end or a slope of taller items on one side with a cluster of smaller items on the other.
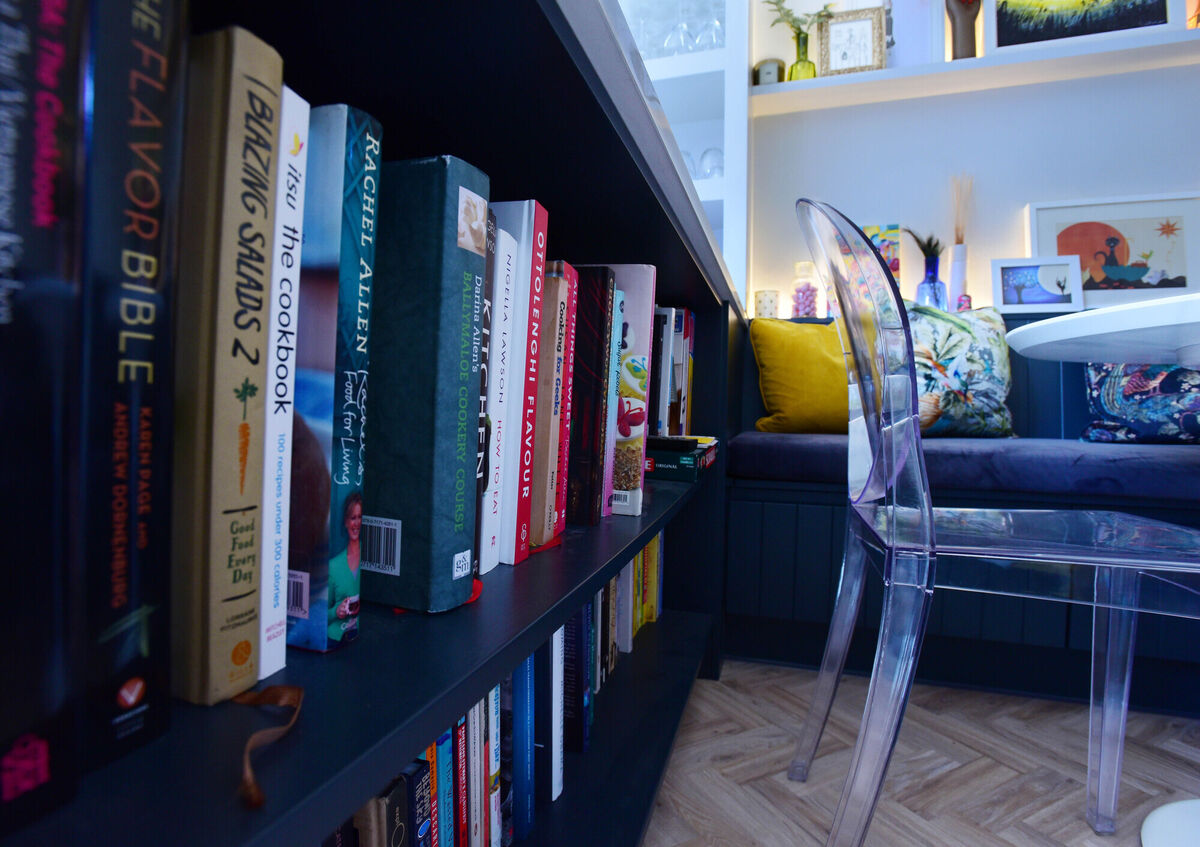
Try to arrange items in groups of two or three and leave some empty spaces to avoid a cluttered look.

Be sure to balance colours and textures also, don’t cluster shiny or boldly coloured items in one area, instead place them evenly throughout. I am not someone who enjoys severely colour-coded shelves, but in some cases where you have a lot of similar items (for example my kitchen shelves where I have glassware, matching ceramics, and booze) it works best to group similar items per shelf for a cleaner, more balanced look.
LAYERING
If you’re into the minimalist look then layering might not be for you, but for those of you with a more is more approach getting layering right is a great way to create depth and dimension. This is true for deep shelves, but also when putting artwork on narrow picture shelves. You can do this by overlapping items, for instance, two paintings, or by layering different types of items, like a small plant in front of a sculpture or a vase.
FILL GAPS
This for me is the fun bit: you have everything back where you want it, you’re happy with the overall balance, and you’re feeling pretty pleased with yourself. Now it’s time to turbo-charge your shelf game. A few little added extras can turn this basic display into a showstopper. My favourite is lighting — a strip of LED uplighting along the back of your shelf is a magic way to bring in some drama, and only costs about €10 per metre.
You can buy battery-powered lights or ideally get them wired to the mains. Add a diffuser strip or a trim to hide the LEDs from sight.
Dotting some greenery throughout your shelves is an easy way to add some elegance, and you don’t have to stop at a pot of trailing ivy — look at bunches of dried flowers for extra colour with no maintenance.
Adding mirrors to the back of your shelves is a brilliant, easy, low-cost way to add extra depth and light to your room. You can also paint the back of the shelves for even more of a pop.
KEEP STYLING
The best thing about shelves is that you can move things around as much as you want. I often rotate my artwork when I feel like a change, and I add seasonal decorations for Christmas, Halloween, and Easter. Once you have a feel for what looks right, you can mix it up as often as you like!
CONNECT WITH US TODAY
Be the first to know the latest news and updates


