Michelle Darmody: How to make a more nutritious version of a Bounty bar

Michelle Darmody: "The base of the coconut bars is quite wide and the chocolate tends to stick the metal rungs on the rack. The cooled chocolate layer tends to come off when I try to remove them from a wire rack."

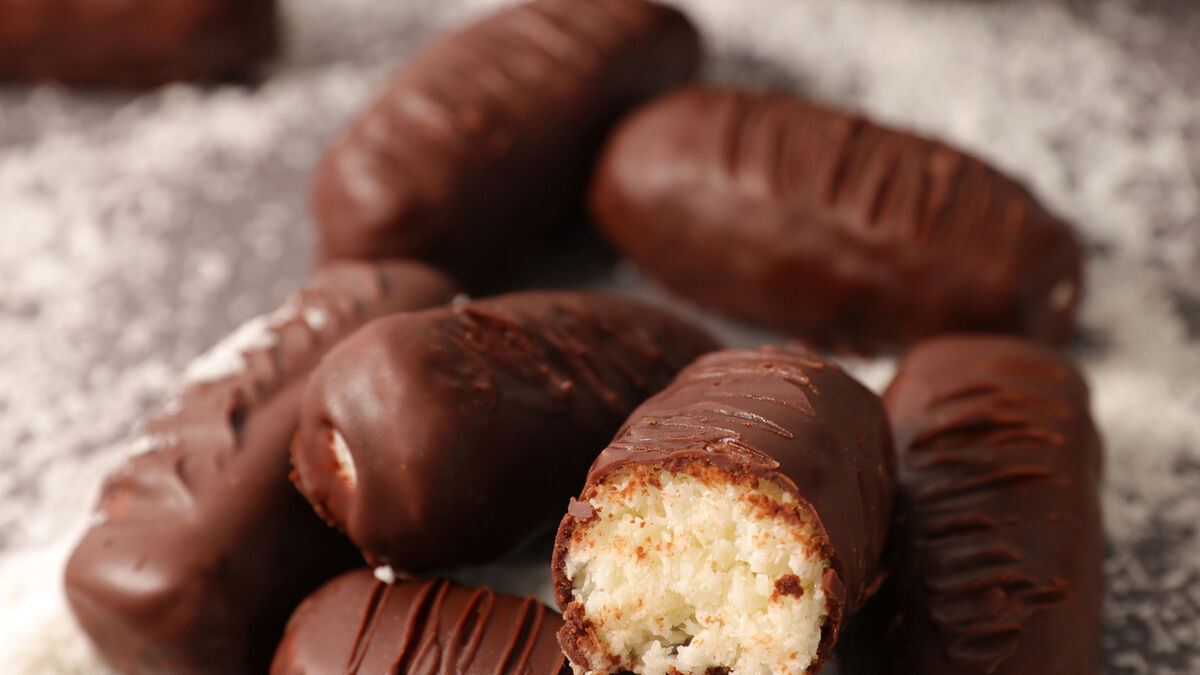
I love the mixture of coconut and chocolate, any chocolate, milk or dark.
Western cooks started to get a taste for coconut in the 1880s but whole coconuts were big and bulky to ship and would often perish on route.
Desiccated, or shredded coconut, as it is sometimes called, was developed to allow for transportation over long distances.
The coconut meat was dried and finely shredded which allowed it to be packed neatly, and sent more easily on long sea journeys. From then on it began to be used far more frequently on European menus.
As technology improved so too did the blanching and drying process which further increased the availability of desiccated coconut.
Moisture encourages spoiling, if you can remove moisture from foods, you can keep it for longer and allow for more ambitious transportation and long shelf life.
These coconut bars are a more nutritious copy of a commercially produced Bounty bar. You can also make variations with condensed milk but I prefer to opt for coconut cream and a little honey to sweeten it. You can taste as you go and drizzle a little more honey if you prefer a sweeter version.
There is no baking involved, just firming up in the fridge.
Homemade coconut bars
These coconut bars are a more nutritious copy of a commercially produced bounty bar. You can also make variations with condensed milk but I prefer to opt for coconut cream and a little honey to sweeten it. You can taste as you go and drizzle a little more
Servings
10Preparation Time
15 minsCooking Time
45 minsTotal Time
60 minsCourse
DessertIngredients
200g desiccated coconut
300mls thick coconut cream
1 tbsp honey
icing sugar, for dusting
200g dark chocolate chips
Method
Mix the desiccated coconut, the coconut cream and the honey together until combined. You can do this with a wooden spoon or in a mixer.
Dust your hands with icing sugar and form ten bar shapes with the coconut mixture.
Sieve some more icing sugar onto a dinner plate and lay the bars onto it. Place the plate into the fridge while you get the chocolate ready.
Line a baking tray that will fit into your fridge, with parchment.
Oil the sheet of parchment lightly with sunflower oil.
Melt the chocolate either in a heatproof bowl placed over simmering water, or in a microwave.
Remove the bars from the fridge and one by one coat them in the chocolate and place them onto the tray covered in oiled parchment.
Allow the bars to firm up in a cool place or in the fridge.
You need to store desiccated coconut in an airtight container and preferably in a cool, dark place. Heat or humidity will cause it to spoil. It may also clump up if it gets wet in any way.
If your desiccated coconut has turned yellow or brown in colour, it is a sign that it has gone off. It may also smell a little rancid if it is past its use-by date. It typically lasts for about four months when stored properly. If you feel you will not use all of it in this timeframe, you can freeze it. The coconut will then last about a year in the freezer.
If you do not have access to coconut cream, you can use tinned coconut milk but only the solidified part. You will need to use the coconut milk which you get in a tin, not the one in a Tetra Pak carton. The coconut milk that comes in the Tetra Pak will not solidify; it is a much more diluted version.
Cream of coconut is also a different product which tends to be sweetened and is used for making things like pina coladas. It is syrupy and not as solid as coconut cream.
I find using oiled parchment is better than placing the chocolate-coated bars onto a wire rack.
The base of the coconut bars is quite wide and the chocolate tends to stick the metal rungs on the rack. The cooled chocolate layer tends to come off when I try to remove them from a wire rack.
I use two forks to turn the bar in the chocolate and then gently lift it out with forks as well.
You can store the bars for up to five days in the fridge in an airtight container. You can freeze them as well but you may find that the chocolate discolours on thawing. It will still taste great but not look as good.
These flavours are paired together in famous Australian bars. You can use dried sour cherries or glacé cherries, which are sticky and sweet but work well. I finely chop 80g of them and stir them through the coconut mixture.
Dice about 80g of dried pineapple slices and stir them through the coconut mixture before shaping it into bars. It adds a lovely tropical juicy twist. The pineapple is quite strong in taste so adjust the amount you add in if you prefer a more subtle flavour.
If you manage to find freeze-dried raspberry powder, it works beautifully in these bars. If it is not available locally, you can find it in online baking shops. It adds a beautiful pink hue to the bar. Add two teaspoons of the powder into the coconut mixture before you shape your bars. Coat them in the chocolate in the same.


