Caitriona Redmond: Sweet treats to bake ahead of the season — and they're suitable for freezing
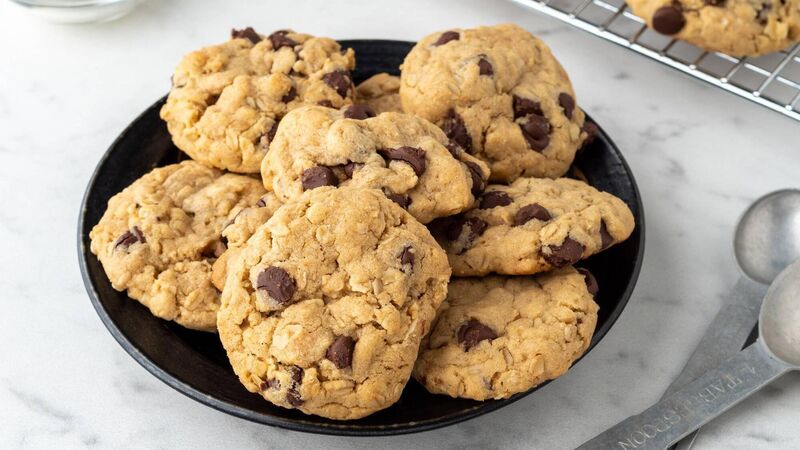
These malted-milk cookies are sure to be one thing that won't give you a space headache in the kitchen!
Doesn’t everybody have a hidey hole and a doom press?
There’s a corner in my office that I call the ‘hidey hole’. Normally my office is a blissfully calm and quiet space. It’s the one area of the house with calm colours and a big comfy bed to sit on and recant the events of the day at school. When I’m not working I will often walk past and see the kids lounging in there because it’s obviously much nicer than their teen and tween-boy spaces.
Doubling up as the spare bedroom, it’s also the area where I keep the Christmas stuff. Using the word ‘stuff’ suggests that my office is rammed with junk and detritus for Christmas, which it truly isn’t, I swear.
I’ve been adding one extra Christmas-related item to my shopping trolley every week with my regular groceries since the beginning of September. Those items had to be stored somewhere because my kitchen is fairly small and suited only to storing run-of-the-mill products. My workspace became the default location. As I write this week I’ve taken down the Christmas decorations to clean and organise them, plus figure out what needs repair or new batteries. The decorations won’t go up quite yet and now reside behind my chair. It’s all becoming a little cluttered in my workspace if I’m very honest.
On the other hand, my food storage is on the sparse side, and for good reason. The beginning of the month of December is actually the perfect time to declutter, unlike January when sometimes you can feel more sluggish after the Festive season. Just think of all the lovely leftovers you can store and enjoy with little to no preparation, providing you have the space.
Lunchboxes, clean jam jars, empty takeaway containers, and sandwich bags are all ideal vehicles for extending the life of whatever you cook in the weeks ahead. I have a ‘doom press’ which holds all of these handy items all year around. The kids open the door and chuck their boxes in willy-nilly; lids shift to the bottom and some boxes are lidless, but they all work.
This weekend I’m resolving to organise and catalogue the ‘doom press’. No more opening the door with a slight cringe in case something spits out on top of me because it’s been badly stacked. I’m a realist, I know my organisation is not going to last all that long but at least I’ll set my mind at ease by figuring out how much storage I have for those Christmas leftovers.
This week’s recipes are designed for making in advance and freezing. They will get you ahead of your preparation for any special event, and in particular Christmas. I’ll be dipping into the ‘doom press’ to find the right receptacle for each as well!
Chocolate Mint Cupcakes
Totally delicious, these cupcakes will keep for up to 5 days in a sealed dry box but I doubt they'll last that long.

Servings
12Preparation Time
50 minsCooking Time
30 minsTotal Time
1 hours 20 minsCourse
DessertCuisine
North AmericanIngredients
70g dark chocolate, broken/chopped
150ml water
90g margarine (I use Stork)
120g caster sugar
100g golden syrup
2 medium eggs
100g plain flour
35g cocoa powder
40g ground almonds
1 tsp peppermint essence
1 tsp baking powder
6 chocolate thin mint squares, each broken into quarters
Method
Place the chocolate & water in a small saucepan & heat very gently, stirring regularly, until the chocolate is melted and combined.
Put the margarine into your mixing bowl & beat briefly, then add sugar and golden syrup & beat well. Add eggs one at a time, beating until light & fluffy.
Add the peppermint essence & mix through.
Sift your remaining dry ingredients together into the mixing bowl & stir, then add the wet chocolate mixture to the bowl and stir until it's combined.
Pour your batter into your cases. put two pieces of the broken chocolate thin mint squares into each cupcake, pushing under the batter.
Bake at 150°C for approximately 30 minutes. The cakes are more dense and moist than a standard sponge, but will not be actually gooey inside.
Leave on a baking tray to cool and ice if you want to. I use a simple icing/frosting recipe and replace the vanilla extract with 2 teaspoons of peppermint essence. Pipe if you want or simply spread on with a knife.
Decorate the cupcakes with another chocolate thin mint or a mini candy cane.
Malted Make Ahead Cookies
These malted milk treats have a beautiful fudgy flavour thanks to the malted milk powder that I use in the baking process.

Preparation Time
40 minsCooking Time
12 minsTotal Time
52 minsCourse
DessertIngredients
90g dried malted milk extract - Horlicks or Ovaltine
90g caster sugar
85g butter at room temperature
2 medium eggs
200g plain flour
1 tsp baking powder
1 packet Malteasers (malt balls covered in chocolate)
Method
Preheat your oven to 200°C.
Cream the milk extract, caster sugar and butter together until light and fluffy. Beat in the 2 eggs until fully combined then add the flour and baking powder and mix again. Finally crush the malteasers in your hands before stirring them into the cookie dough.
Using a dessert spoon, spoon the mixture directly onto the tray, leaving a lot of space between each cookie. I normally bake only 4 on each tray so you will need to rotate your trays, however, it's rare you'd bake the whole batch all at once.
Bake in the oven for between 9-12 minutes. As soon as they start to turn golden brown, remove the trays and leave the cookies on the baking paper for 10 minutes before gently moving with a spatula to a cooling rack.
The cookies will keep for up to 7 days in a sealed container kept in a cool, dry location but honestly I'd refrigerate or freeze your dough and bake these cookies fresh.