How to paint your home like a pro: Tips and ideas

Surfaces need to be patched, cleaned and primed to get the perfect finish
How to paint your home like a pro: Tips and ideas

Preparation is always crucial in any DIY task. When painting using swiftly drying, moving fluids, sloppy missteps will be right there, dried into the biggest canvases of the home, taunting you over your Rice Krispies. The surfaces to be painted must be patched, even, clean and primed. The surroundings and vulnerable details need to be protected, and we need plenty of room to work in and to safely reach out from any ladder. The actual painting is the relatively quick, satisfying bit, so surrender a couple of tedious hours to get the room ready before the fun starts.

Most of us use rollers to do the larger areas of wall. Rollers spatter, misting paint over every unprotected surface. With living spaces, clear as much of the furnishings out of the room as possible. Take any curtains or blinds down and shift the heavy seating and tables into the centre of the space, and cover them with old sheets, drop cloths or builder’s plastic (best as it won’t absorb splatters). Tape the bundle if necessary and tuck the covering well underneath the pieces.

Key Tip: 
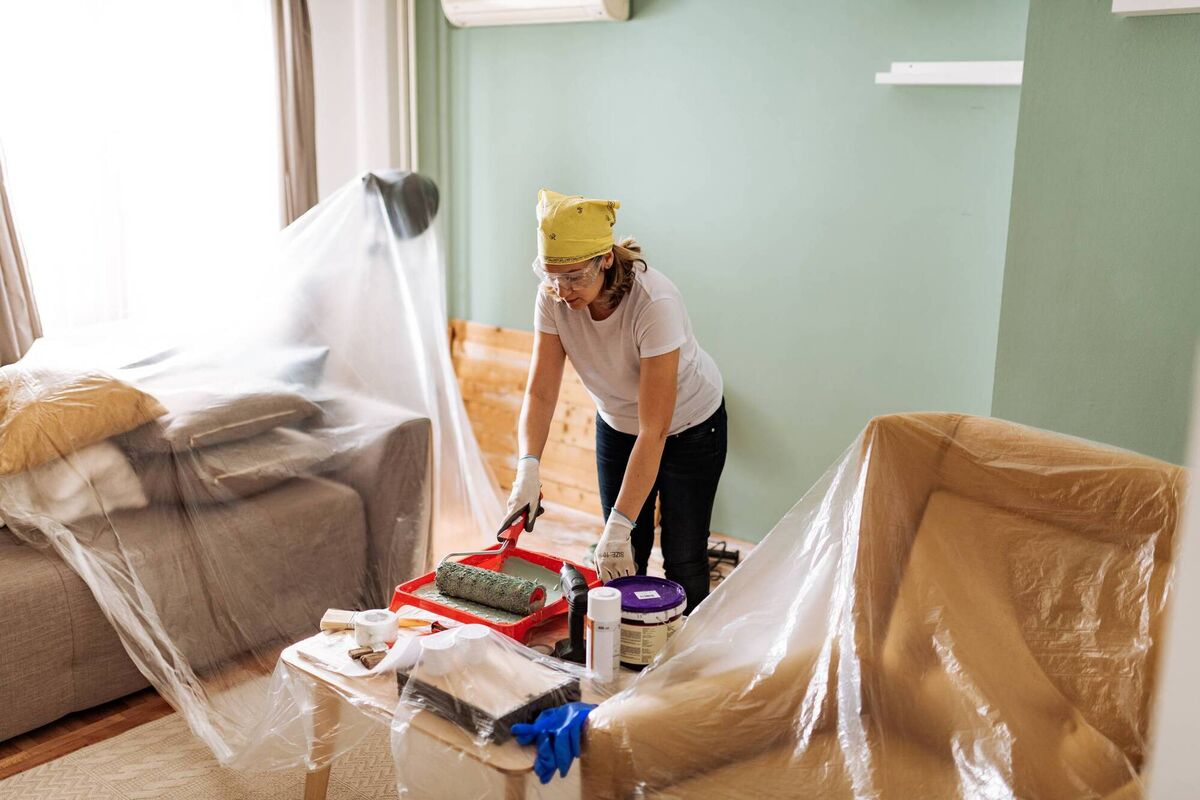
Armchairs can be slotted upside down over the couch. In a larger room, create two piles that allow you to move between them with a step-ladder and reach right across the ceiling without a landslide. Break up cardboard boxes and cover your dining table with a good edge overhang

If you’re covering carpeting with plastic, tape all edges down to prevent tripping. Heavy canvas drop-cloths will stay in position under their own weight, and should absorb all but the heaviest spill or spatter on carpets. Keep in mind that left loose, they can move under ladders laid over a wooden floor. Lap them about 15cm over each other, tape them to each other and up onto the base baseboards. It’s better to line the entire floor and avoid moving drop-cloths around – a fantastic opportunity for smearing and spreading undetected spills. Screwfix do an excellent 12’ x 9’ protective cotton dust sheet with water-resistant polypropylene and polyethylene layer that’s perfect for furniture or flooring. €13.95 (reusable), screwfix.ie. If you going to cope with one master drop-cloth? Stay in the moment, every time you move it.

Key Tip: Low tack painter’s tape, unlike cheap, conventional paper masking tape, will create a cleaner line, seals better at the edges with a little pressure, and comes off far more easily without tearing. Taping trim and skirting – try covering just the 45 °edge.

.
.

Run down a door architrave onto the skirting with unstuck tape suspended over the board as a spatter shelter. Turn off the power, and loosen light switches, conduit positions and power plates using the two securing screws, allowing them to drop forward (but not dangling from the wires). Cover the plates or open outlets with tape. You can just cut in some paint around the edges of the outlets with a small brush and refix them into position once dry before turning the power back on. Complex fixtures like the thermostat or burglar alarm controls are better taped with painters tape such as Frog Tape as close to the edges as possible, the surfaces covered in plastic completely, and left in position.

Key Tip: With the power isolated, any sensitive wiring ends, switches and electronic plugs (USB positions etc) should be taped over to stop paint leaching or spattering into the wiring. If the cover plates are off – shield any exposed wires

Remove ceiling light fixtures only if you really have to and if you’re competent to do it — otherwise, bag up your pendant lights inside plastic (bulbs out) and tape around the ceiling plate/strip pieces, and cut in carefully. You might get away with just loosening a decorative ceiling plate for cutting in so long as it’s not supporting the fixture. Never attempt to take any light fitting down before turning off the power, and cover any exposed wiring before painting the area. Try keeping your paint cans, brushes, rollers and tray in one area of the room. Off the floor is generally best. Cover a sturdy small table, or place a board over two saw horses.

Key Tip: Don’t suspend any light fixture of any real weight hang just from its wiring.Use a temporary support if needs be.

We all know the infamous Only Fools & Horses chandelier scenario

Using the same flexible painting tape, run a line over the top edge of the skirting. You may even have enough room between the wood and wall, to actually press the tape into a tiny gap with a blunt putty knife. Glass? Paint? Don’t mess around — cover those windows completely with clear builder’s plastic, edged with painter’s tape, sills included. Your curtain poles and any tie back hardware should all be unscrewed from the wall and the fixings taped in small bags to the pole or rail, ready to be replaced.

If you’re painting the doors remove the handles and lock-plates if possible. Don’t forget to protect the mantle of your fireplace — immovable and easily splattered as you work.

Key Tip: Doors will demand an oilier, timber paint that will take longer to dry and potentially demand 2 coats. Given we will need to touch them to move them, start on the doors first and get them dry before the day’s end

So, we have a small crack or divot in the plaster caused by say removing an old wall-plug? First of all, clean the edges of the crack with a solution of sugar soap in water (500m Diall about €5 per bottle, B&Q) to lift any crud that might interfere with new filler. Using a suitable, flexible filler for the size of the damage (Polyfilla do good ready mixed white products with shrink resistant binders in tubes and tubs) — work the product into the gap with a putty knife.

Don’t worry if it’s a little proud.

Allow to dry according to the manufacturer’s instructions and sand flat. Large deeper holes may need more serious patching with a back fill of expanding foam. Get advice if you’re unsure.

Key Tip: Sand the walls entirely with 120 sandpaper to give them a good ‘key’. If you have sheet paper – try wrapping it around a small off cut of wood to fit in your hand. With a flat matt finish taking a new coat of paint, you might get away with missing this step.

Once finished, clean the walls down with a sugar soap solution (read the bottle), and wipe off with clean water to leave the walls completely clean and ready for painting. Fresh plaster must be primed with a dedicated coating to prevent the thirsty dry gypsum from sucking down the water content of an undercoat. Primers and undercoats often come as one product – around €8 per litre (5l/40m2).

The dense coverage will even up tiny blemishes in the finish. Once dry, it’s then an undercoat (if needed) and however many layers of topcoat you need – generally that’s 2 for fresh walls.

Key Tip: When reconstructing the room, you may be faced with tape that just won’t lift from wooden flooring or trim. Get a hair-dryer. Set it at its lowest setting and train it on the area with sweeping motions. The glue should soften and the tape lift.

x

More in this section

Revoiced

Newsletter

Sign up to the best reads of the week from irishexaminer.com selected just for you.

Cookie Policy Privacy Policy Brand Safety FAQ Help Contact Us Terms and Conditions

© Examiner Echo Group Limited